So this weekend I finally started the build on the modular Voxel. — Until the end of this month, my ability to make progress is a little limited, since my husband is cramming for an exam right now, and me wielding power tools in the garage doesn’t go well with this. — But occasionally he needs a change of scenery and crams at a coffee shop and out come the power tools…
Also, I don’t have a shop, so I can only work in the garage and that generally means moving my husband’s car out of the garage before I start, and then cleaning up, and moving the car back in.
How the project is going
- Yes, you can carry home two 2’x4′ 1/2″ sheets of plywood from the hardware store about a mile down the street. — You just have to carry them on your head. (Yes, I was that eager to get the project started). Apparently folks have seen weirder things in San Francisco, ’cause nobody said anything…
- Wow, I realized that a year has gone by since my previous project that involved any kind of woodworking. (Studying husband at home…)
- Since I don’t have a table saw due to limited space I use a clamp-on guide and my trusty hand-saw for most cuts that folks would use a table saw for. It works well, but only if you are sure your clamp-on guide is securely clamped. — Well, there is always use for a piece of scrap plywood…
- A Dremel is NOT a woodworking tool!
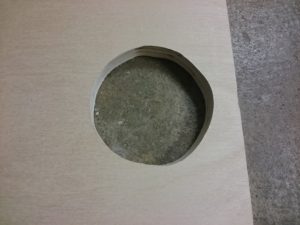
The port-tubes for the Voxel require two 2 9/16th inch round holes to be cut. I tried to cheap out and bought a circle-cutting jig for my Dremel (USD 12 on fleabay…) and it turned out to be a case of “you get what you pay for”. The whole thing was apparently quite wobbly and using the Dremel to sand the inside of the holes I cut left me with something more shaped like a dumpling rather than a circle:
 Eventually I realized that 2 9/16th is only slightly more than 2 1/2 and I happened to have a hole saw kit (similar to this one) with a 2 1/2″ saw. So I scrapped the pieces I ruined with the Dremel, re-cut them, used the hole saw to cut a 2 1/2″ hole, then took a hammer with a wooden handle, wrapped some 150 grit sand paper around it and swirled it around inside the hole, till I got to 2 9/16th, which didn’t take long…
- Get a router!
After that Dremel hole cutting disaster a finally broke down and purchased a router, after contemplating that purchase for over a year. — Should be handy for that 4 3/4″ hole I need to cut for the driver and for trimming the front and the back panel when I get to it….
What I Got
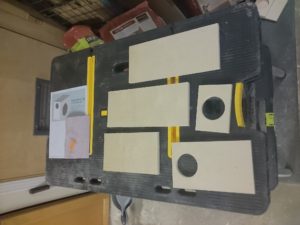
So here is what I ended up with before the husband came back for more in-house cramming for the big exam. — Not that much, but the sides and the internal mounting post for the port tube of the Voxel cabinet are cut:
Tip: Clean Cuts With a Hole Saw
You don’t want to cut from one side right through to the other side top to bottom when using a hole saw. That is going to cause bad splintering when the hole saw exits on the bottom side.
The trick here is to start from one side, then cut until you get approximately to the middle. — Then turn over your work piece. You’ll already see the center hole from the drill: Since the drill is longer than the actual hole saw blade it has already gone all the way through.
Now start drilling again from that other side: Lining up the hole saw is trivially easy, since you already have the center hole from the drill. Now drill all the way through. — The “exit” will now happen in the middle of the hole you are cutting, rather than on the surface. There’s still a little bit of splintering, but it is now in the middle of the cut and it only takes a few seconds with sand paper to clean it up. No more splintering on any visible surfaces of your project!
