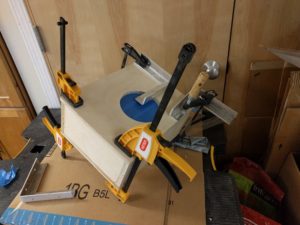
The Voxel enclosure gets a front and a back and the port tube is installed. Also, using a router for the first time and learning how to use a Jasper jig to cut circular holes.
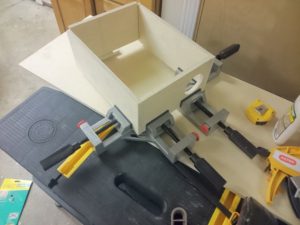
I had previously built the frame for the Voxel enclosure and cut the inner support piece for the port tube:
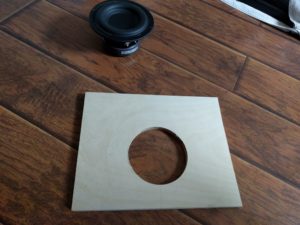
Next was to cut out the front and back piece for the enclosure. The back is just a rectangular piece of plywood and the front is another rectangular piece of plywood, but with a hole for the driver cut out.
Since I had recently acquired a small router with a plunge base, I decided to make good use of it in this work step:
For the Voxel you need to cut a 4.75″ round hole into the front piece of the enclosure. This is way too big to use a hole saw (which attaches to a drill) and a router is the recommended way of doing this.
How to Cut a Round Hole with a Router
As with many things in woodworking, the answer to that is to use a jig. You can either build your own or buy one. After considering my options for a while, I decided to buy a Jasper jig, since it was quite reasonably priced at around USD 35 and it seemed more versatile and more precise.
You unscrew the plastic base from the bottom of your router’s plunge base and screw on the Jasper jig. The Jasper jig is pre-calibrated for cutting holes with a given diameter using a 1/4″ router bit.
The way the Jasper jig screws onto your router’s plunge base means that all the labeling and the attachment hole for the pivot pin are actually on the underside. However, thinking about this makes sense, since some of the pivot holes for smaller diameters will end up underneath the plunge base and would otherwise be unusable.
To cut a round hole with a Jasper jig you have to
- Start out by placing your work piece on another piece of sacrificial wood. This is required because the router will pivot around a pin in the center of the hole you are cutting. If there is no sacrificial wood underneath that the pin also goes into, things will get wobbly once you are about to complete the circle and your work piece will most likely be ruined by the pivot sliding off center.
- Using a 1/8″ drill bit, drill a pivot hole into the center of the area you want to cut out. Make sure the drill has a tiny bit of play in the hole by moving it in and out while it spins. Also make sure to drill deep enough all the way into the sacrificial wood underneath.
- The Jasper jig comes with different pivot pins. Pick one that is long enough such that it reaches into the sacrificial wood, but not so long that it would stick out of the hole you just drilled by more than about 1/8″.
- Put the pivot pin into the right hole (corresponding of the desired hole diameter) in the bottom of the Jasper jig, which is already attached to the plunge base of your router.
- Place the pivot pin with the Jasper jig into the pivot hole you just drilled and press down until the Jasper jig sits flush on your work piece. — You should now be able to spin the Jasper jig with the plunge base around the pivot pin. — Insert your router into the plunge base and you are ready to go.
Comments on Routing
Multiple Passes
In my case, I have to cut a circular hole into a piece of plywood that is about 1/2″ thick. It is recommended that you do not cut more than 1/4″ deep in one go.
What I ended up doing was taking 3 full turns, first with the plunge depth set to a little under 1/4″, then a second with the plunge depth set to a littler under 1/2″ and a third one with the plunge base set to a little over 1/2″.
After the third turn you have cut a hole and also cut a little groove into the sacrificial piece of wood underneath. You can now lift the router with the plunge base and the Jasper jig off your work piece, separate the work piece from the sacrificial piece of wood it is sitting on and pull the pivot pin out of the hole.
Direction
Looking down onto your router from above, pretty much all of them will spin the bit clockwise. For a clean cut you should make sure that the blades of the bit “pull into” the piece you are trimming. — Since we are cutting a hole by routing a circular groove, the edge we care about is the outer one, so you should move the router in a clockwise rotation.
Comparing the smoothness of the inner and outer edge of the circular groove I have to say I didn’t notice much of a difference, but this might be due to the Jasper jig holding things firmly in place. This recommendation might be more important for any kind of free-form routing.
Clamping
Also it should go without saying that you should keep the sacrificial piece clamped to your work piece the entire time. You might, however, have to move the clamp from time to time because it might block the Jasper jig as you router and jig around. — I ended up using two clamps, putting on the second one and then removing the first one, so that the Jasper jig does not get blocked. I had to do that clamp dance about three times for each turn.
Result
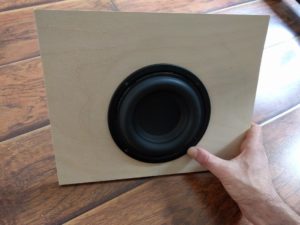
At the end of the day I ended up with a nice clean 4.75″ hole that the driver fit into quite nicely:
Back and Port Tube
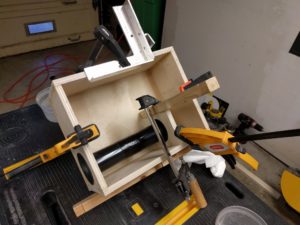
In the next step I glued the back of the enclosure onto the frame. Once this was held in place with clamps, I started to install the port tube. I had previously confirmed that the port tube fits snugly into the hole I cut for it.
So at that point, with the clamps holding the back firmly in place, I installed one tube in the frame of the enclosure and the other piece into the support I had previously cut that goes into the inside of the enclosure.
Then I applied glue onto the support and positioned it inside the enclosure such that the two pieces that form the port tube line up nicely and attach them to each other with strong gorilla tape.
Doing this determined the final location for the support, so the last step remaining was to clamp the support.
At the end of this I ended up with lots of clamps attached to my Voxel:
After letting this sit for a day, it was time to glue on the front as well. — Before I did that I decided to put painters tape on the inside of the front piece, to prevent spray paint from getting inside the cabinet once we get to that stage.
And here is what is currently sitting in my garage. It is starting to look a little bit like a speaker enclosure:
Next Steps
- Holes in the back for binding post
- Flush-trim front and back
- Fill any gaps and voids with either wood filler or glue (haven’t decided yet)
- Build enclosure for the plate amplifier part of the modular voxel.
- etc, etc…
